This page contains a pictorial representation of the squash pollination process. These pictures represent
events over a four day period, starting the evening before a controlled cross polination, the pollination
the next morning, then the unwrapping of a successfully pollinated female squash after three days.
The following pictorial sequences are two different controlled pollinations on 7-31-05 to show the entire
process of doing a controlled pollination
I could not figure out a way to rotate pictures, so many are sideways. This will be fixed later. All pictures have been
reduced about 80% from originals which can be sent by email for anyone wanting a for detailed look at given picture.
email butternutbreeder@frontier.com
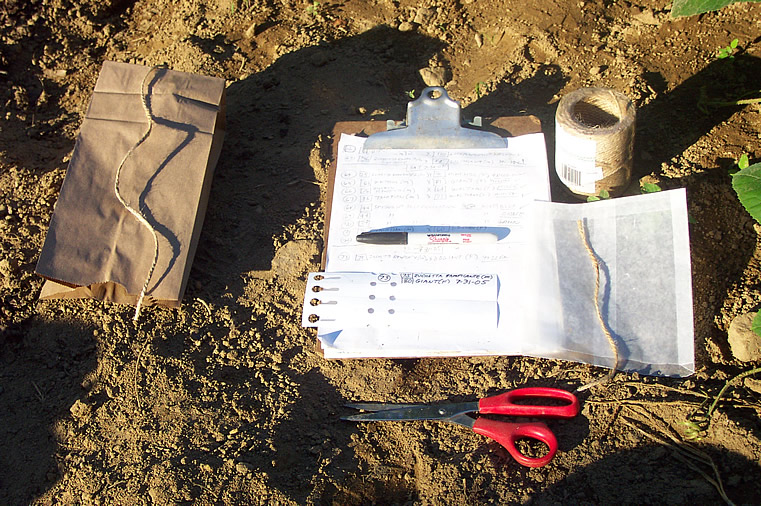
Setup - These are the materials I use to do a squash controlled pollination:
one lunch bag
one wax paper bag
two pieces cotton jute twine, 12 and 16 inches
6 inch garden label
Sharpie permanent marker
scissors
clipboard with breeding notes
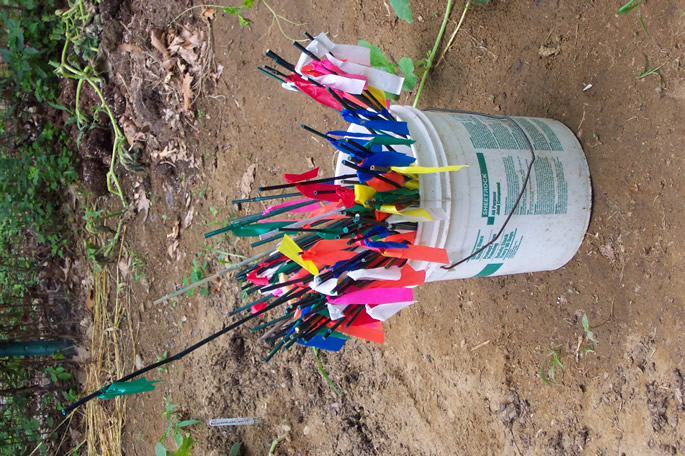
marking flags
Most of the materials are shown below.
To keep track of crosses and to work swiftly in the low light of early dawn 2' bamboo sticks with different
colored plastic flags allow quick location of preselected male and female squash blossoms. There is not often not much
time between early light and time to leave for work, and I have done as many as 20 controlled pollinations in an hour.
On the clipboard are notes of controlled pollinations made day-by-day.

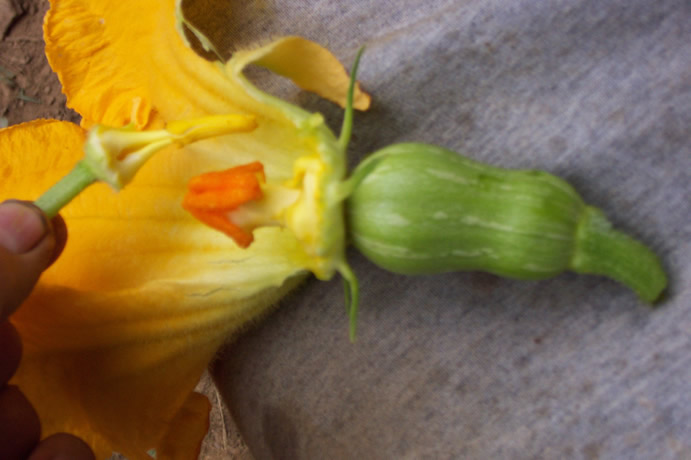
This is an sideways cutaway of a female butternut flower. The target for pollination is the three lobed dark orange
stigma atop the pistil.

The male stamen that sheds pollen is now shown over the pollen receptive stigma of the female flower.
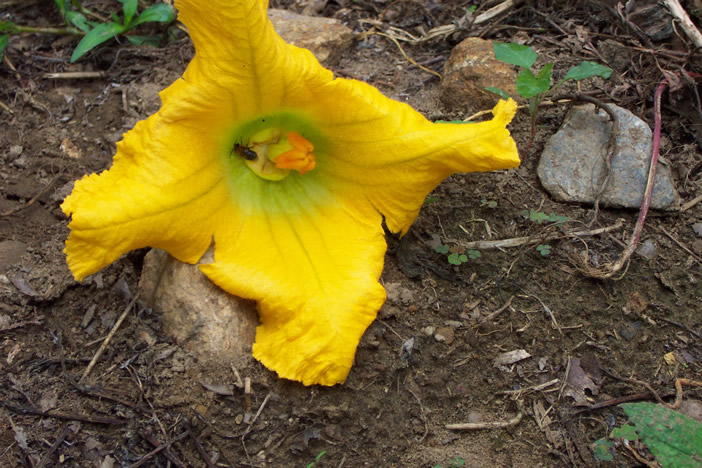
The requirement for bagging is due to indiscriminate pollinations by honeybees and other pollinating insects. Here we
have a honeybee in a female flower.